One of the most common questions our Caroma customer service team gets is, "My toilet seat is broken. Which replacement seat is the right one for my toilet? "
That is both a simple, and sometimes slightly more complicated question. To get the answer you need to know a few things:
1. Do you have an elongated or a round front toilet bowl?
2. What is the style/ shape of your toilet?
3. And lastly, what kind of features do you want?
First things first. The most important thing to consider: is - do you have an elongated or round front bowl?
This is easy to determine. You measure from the seat holes in the bowl to the tip of the bowl. An elongated seat is about 18.5" while a round front bowl is about 16.5". (To see the full article giving pros and cons of elongated and round front toilets, Click Here)
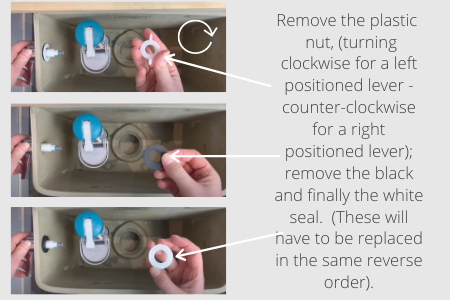
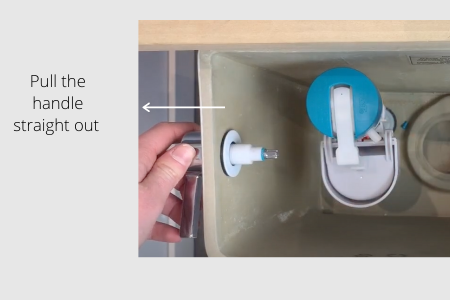
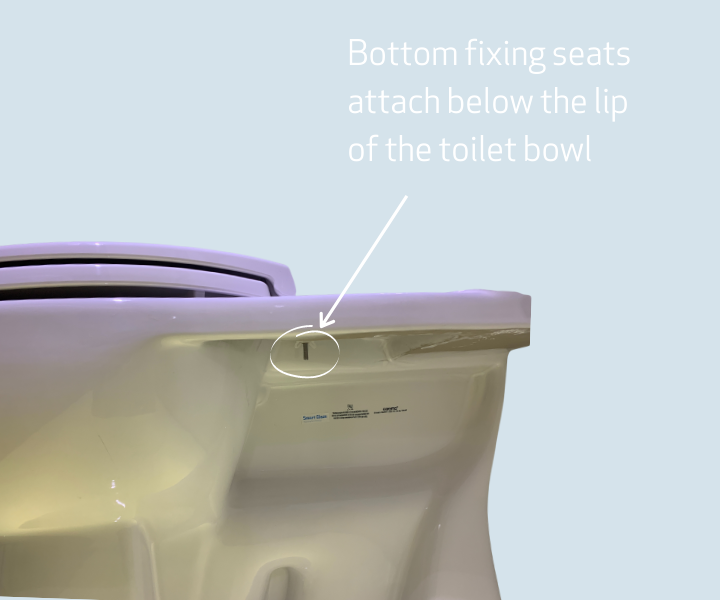
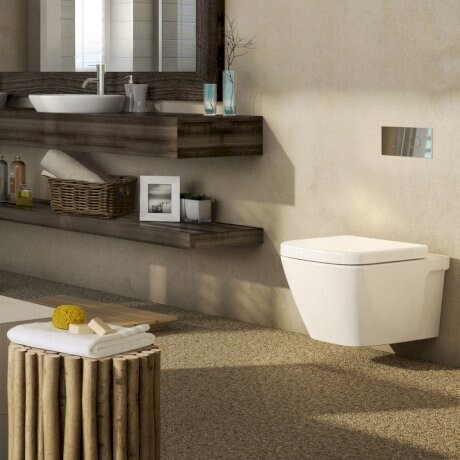
Next - why do you have to consider your toilet style? Well, traditional toilets with standard 12" rough-ins have a lip at the back, allowing you to feed a bolt through the bowl and then tightening it underneath. This is called a bottom fixing seat, (meaning it tightens from the bottom). If you can easily reach underneath the bowl to tighten or loosen your seat, you likely need a bottom fixing seat.
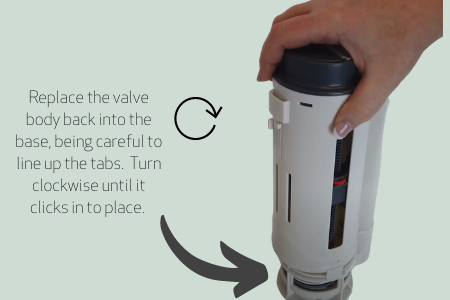
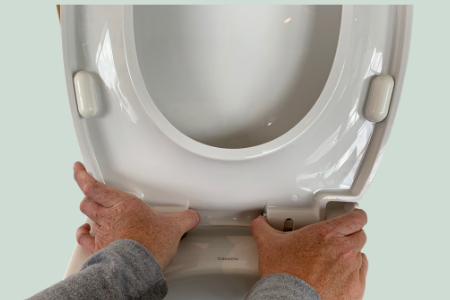
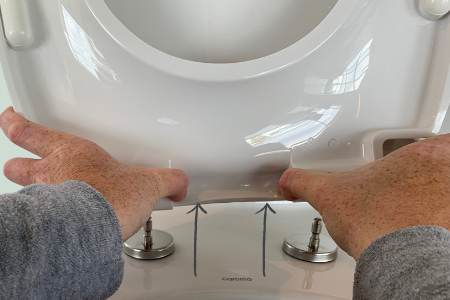
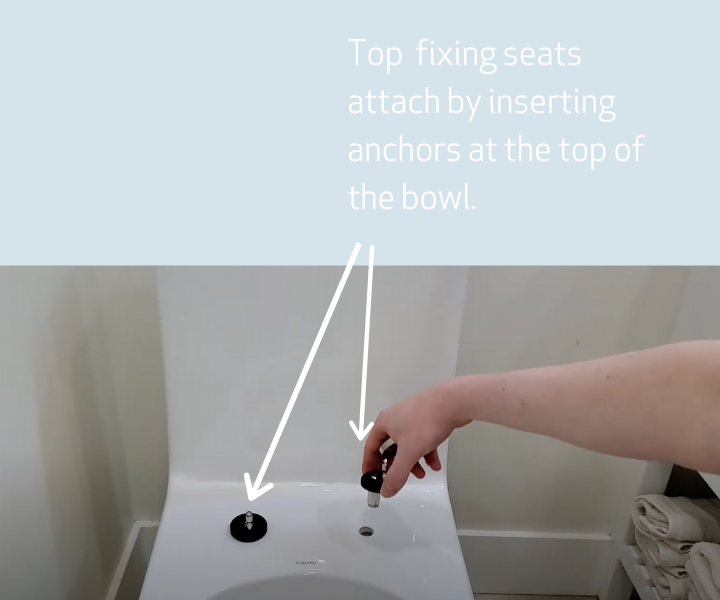
A lot of newer style toilets have what is called 'fully skirted' bowls, meaning that the side of the bowl is smooth and doesn't show the snake like trapway. If you have a skirted bowl it can be really difficult to reach underneath to attach or tighten a seat. For this type of toilet you should use a top fixing seat, meaning that the toilet seat tightens from the top. You essentially insert anchor bolts into the holes in the bowl and then the seat fits into the bolts. (It's similar to attaching something to drywall; you insert anchors into the wall and then insert the bolt or screw into the anchor). To watch a video showing the installation of our Caroma top fixing toilet seat to our fully skirted Caroma Caravelle Smart One Piece toilet, Click Here)
Style is also important if you have a uniquely shaped toilet. For example, A Caroma Cube bowl is technically "round front', as it measures 16.5" inches, but obviously a typical oval shaped round front seat won't work.
If you have a cube or round or otherwise uniquely shaped bowl, you will often have to use the seat that is supplied by the manufacturer to fit that particular product. For the cube bowl for example, Caroma has a specific Cube seat that fits the dimensions perfectly.
The last consideration might just be the most confusing, and this is choosing features! The most commonly sought after feature in a seat is a soft-close option. Anyone living in a house without a soft-close seat likely has been jarred awake by someone "dropping" the toilet seat in the middle of the night! A soft-close seat has a hinge that lowers the seat slowly, without jarring or loud noises. It has become as close to a 'must-have' as there is in toilet seats.
The next option is a wonderful upgrade for hygiene and that is the quick release detachable seat. All seats of course are "detachable", but a quick release seat means you can simply push a button or two and the seat pops off, allowing for frequent and thorough cleaning. Once you have a quick release detachable seat, you likely won't want to give it up.

Lastly, some seat holes in bowls are set apart more/less than others. For example, older style Caroma bowls sometimes had seat holes that were different that that of current bowls. If you are buying a new seat, (especially for an older bowl, or made by a different manufacturer), it's good to check that the seats will fit into the hole set out on your bowl. This is always indicated on the spec sheet for the seat, that is listed on the manufacturer's website.
So, to summarize- when ordering a new toilet seat, look for:
- Round front or Elongated
- Top or bottom fixing
- shape
- features you want
- make sure that the distance between the attaching bolts will fit your seat.
For help with a new seat for Caroma toilets, you are always welcome to contact the customer service department at 1-800-460-7019.