The flush valve in your Caravelle Smart lever toilet is connected to the handle assembly so replacing one involves replacing both.
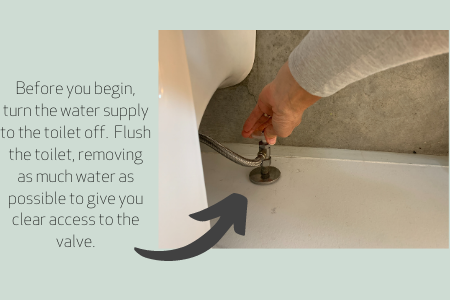
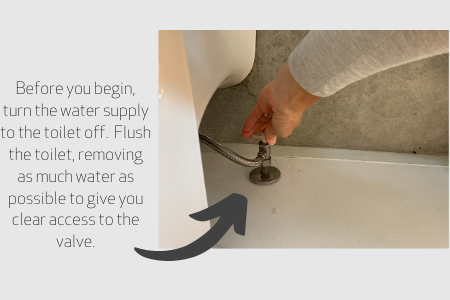
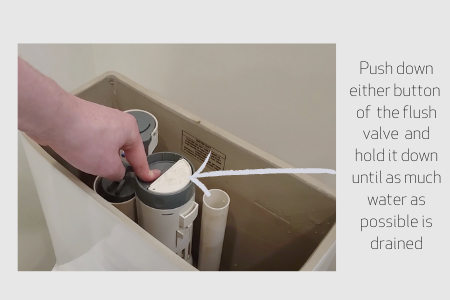
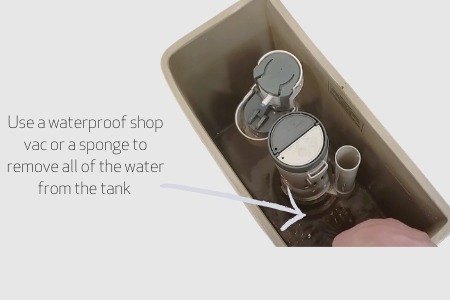
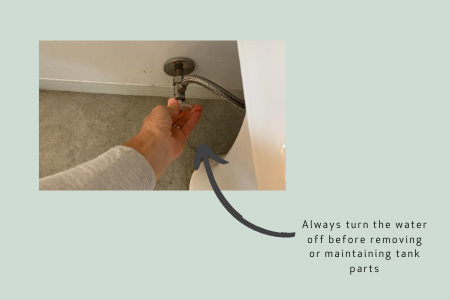
Before removing or adjusting any internal tank components on your toilet make sure to turn off the water supply by turning the handle at the water inlet, located behind the toilet. Flush until as much water as possible empties out of the tank. You can then remove the remaining water by either sucking up with a shop vacuum or using a sponge to soak up the remaining water.
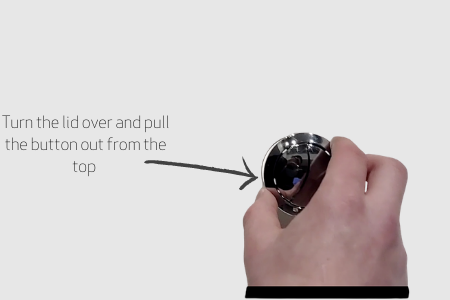
Remove the tank lid.
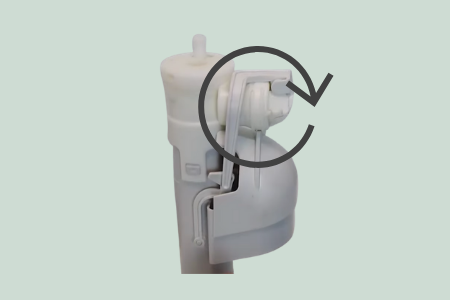
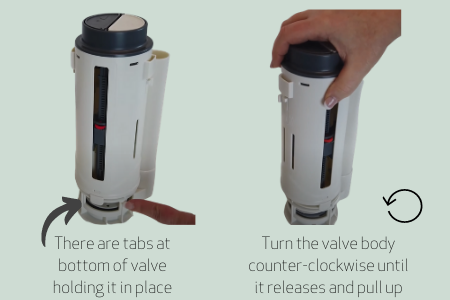
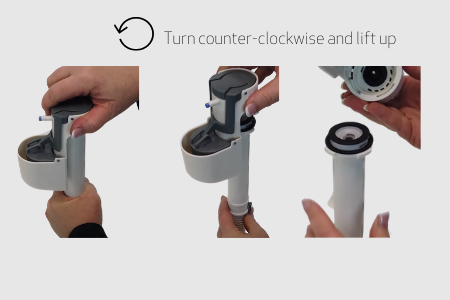
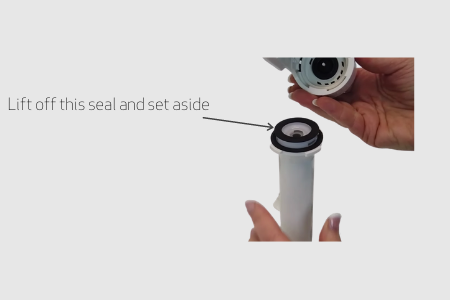
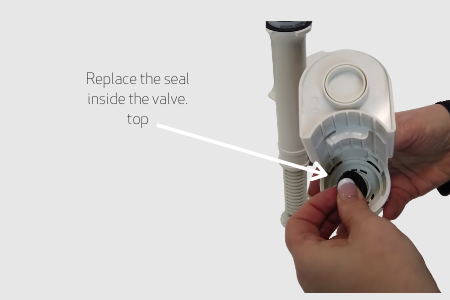
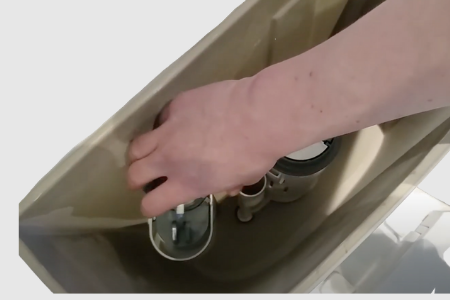
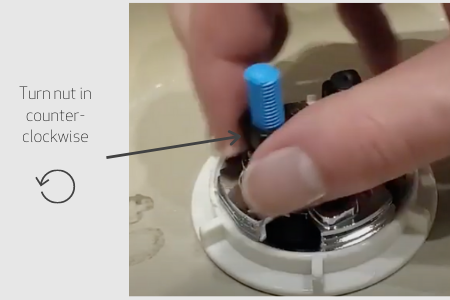
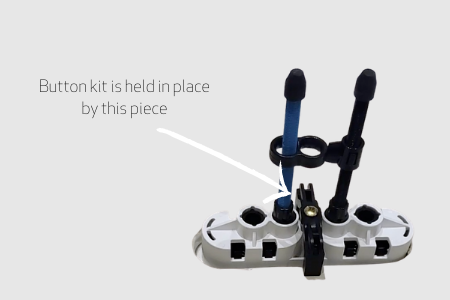
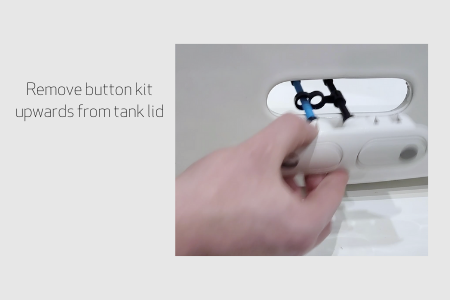
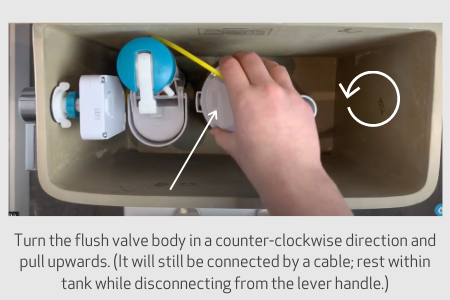
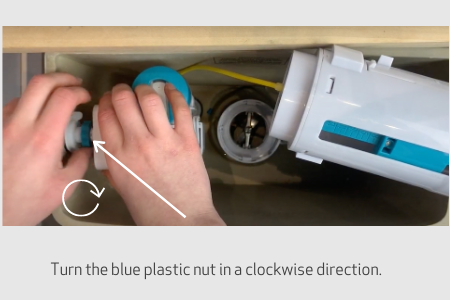
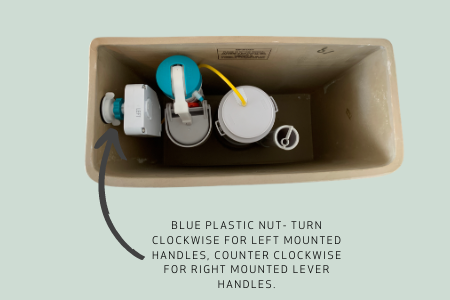
Remove the flush valve by turning it in a counter-clockwise direction and lifting upwards. Rest the removed flush valve on the top of the tank while disconnecting the lever handle. You will see a blue plastic nut located in between the handle and the handle box. Turn in a clockwise direction until it detaches from the main spindle. Remove the Flush Valve and the attached box; set aside.
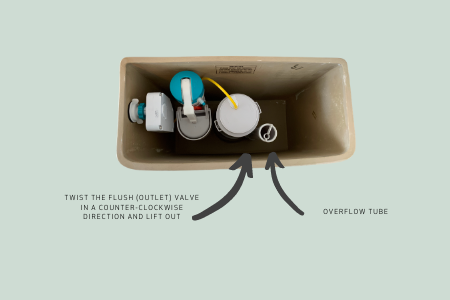
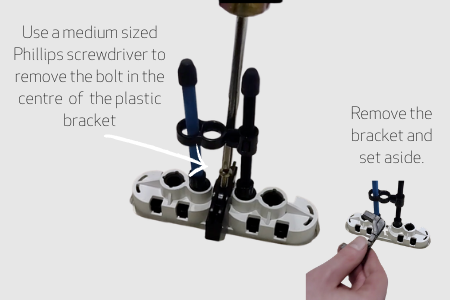
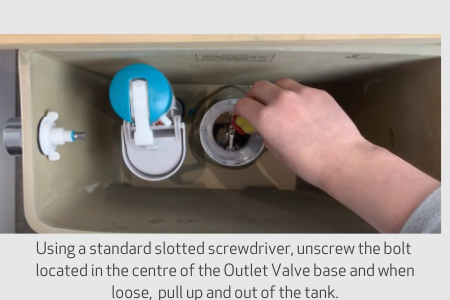
Remove the base of the flush valve and the attached overflow tube by using a medium sized Phillips screwdriver. Turn the screw in the centre of the base in a counter-clockwise direction until you can remove the base and set aside. Important tip: Most of the time when replacing the outlet valve you will NOT have to remove the base. You can insert a new outlet valve into an existing base. The only reason to replace the base is if it is broken or cracked. If your existing base is intact, simply delete this step.
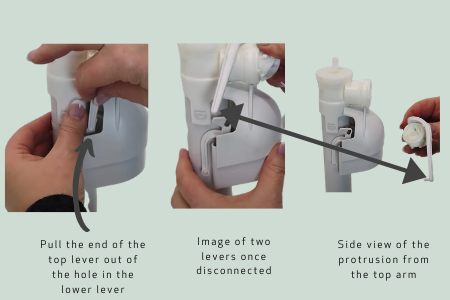
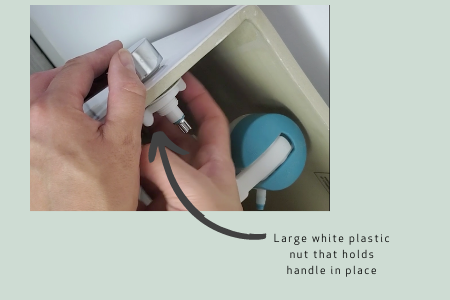
Next you will remove the handle
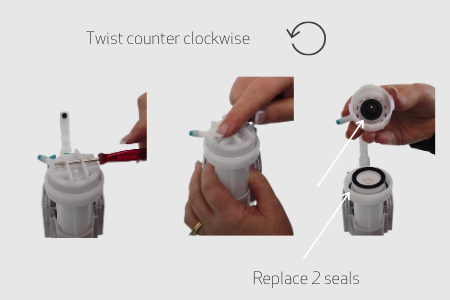
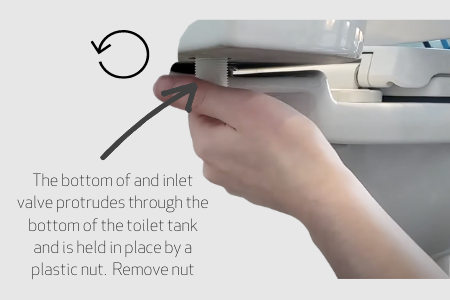
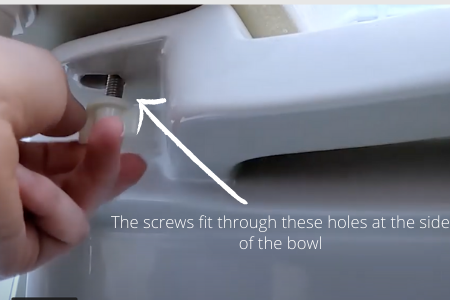
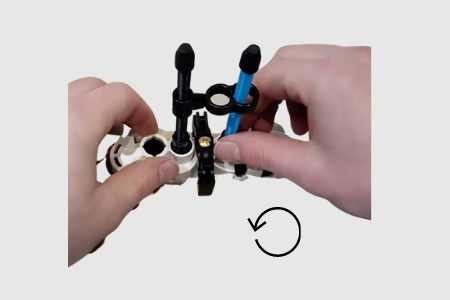
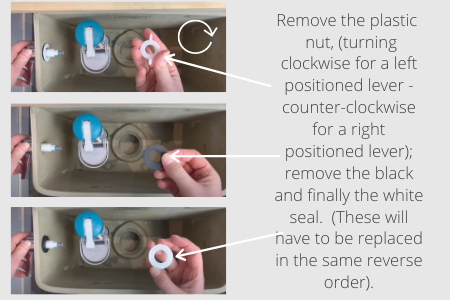
- Turn the white nut (as shown below) in a clockwise direction. (You would turn counter-clockwise for a right hand mounted lever handle).
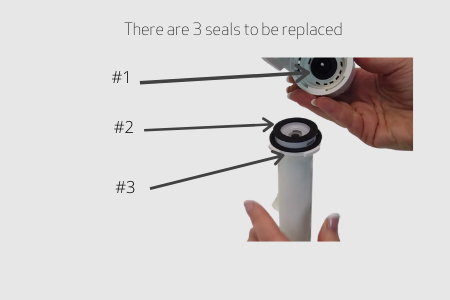
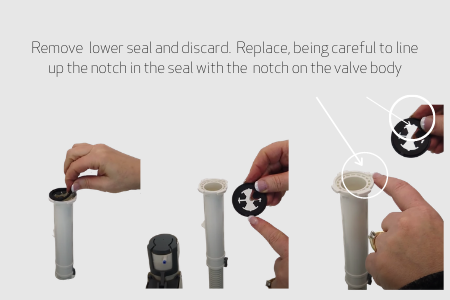
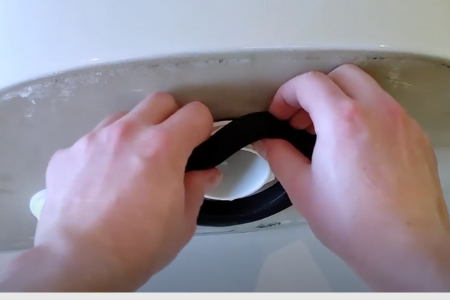
- Remove the two gasket seals placed against the tank. (Be careful to note the order of the placement of these seals as they will need to be replaced in the same order. The thicker charcoal seal goes against the tank and the white seal is placed on the outside). Set aside.
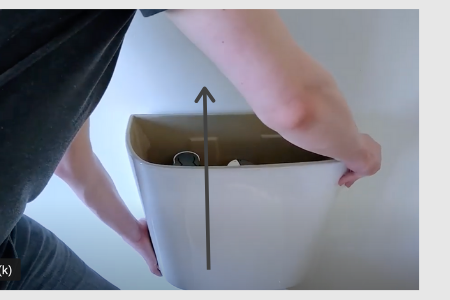
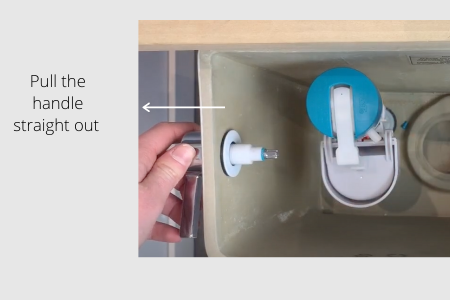
Pull the handle out. You might need to wiggle the handle a little bit to more easily pull it out from the hole in tank where it is installed.
You are now ready to install the replacement handle and flush valve.
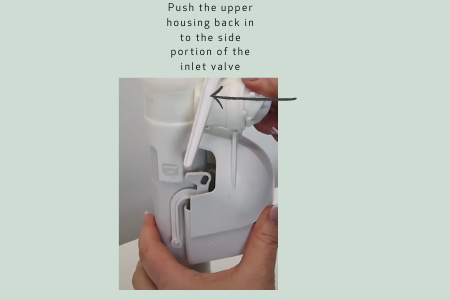
Insert the lever handle in to the hole at the side of tank. Replace the charcoal and white rubber gaskets in the correct order and then place the large white nut on to the spindle and turn in a counter clockwise direction, (clockwise for a right mounted lever handle). Important tip: While you are rotating the nut, hold the handle up to the proper position. If you let it drop down you will be attaching it in the wrong position. (The handle will drop down once you stop holding it, but this is fine. Once the remainder of the lever handle is connected it will be aligned properly.
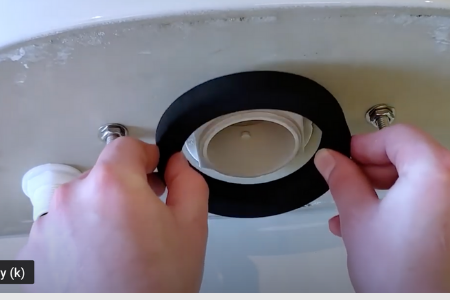
If you removed the valve base and overflow tube earlier you should now install the replacement by inserting it back into the hole at the bottom of the tank, (making sure to position it the same way it was originally placed, with the overflow tube placed to the right of the base, as pictured below). Tighten it using a Phillips screwdriver until placed solidly, without movement. Do not over tighten or you may crack the base. It simply needs to be in place without any movement).
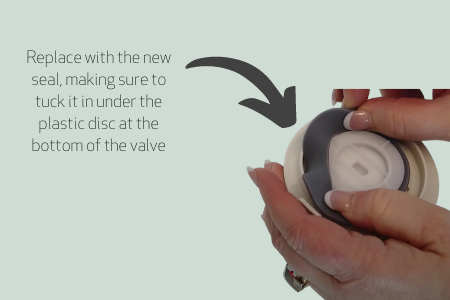
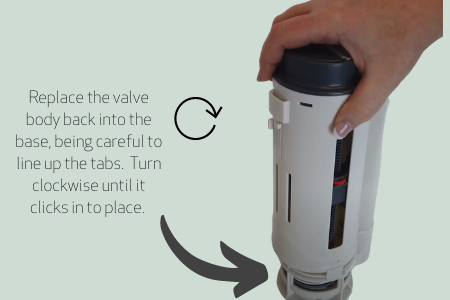
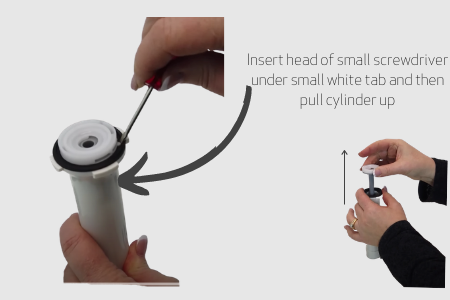
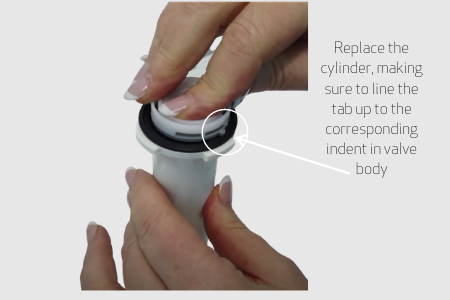
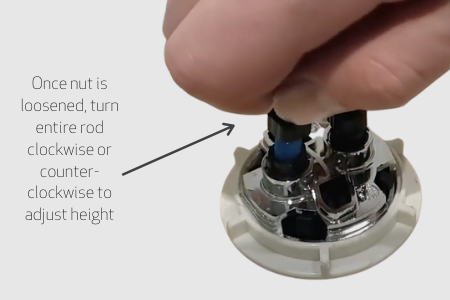
Insert the flush valve by placing into the base and turning in a counter-clockwise direction until it clicks into place.
Attach the handle base on to the handle spindle. It’s a good idea to tuck the tube behind the flush valve to get it out of your way. (Important tip: While attaching the base and screwing it in to place, hold the handle up to the desired position.
If you don’t hold the lever handle to the correct position, you will be tightening it in to the downward position). To tighten, turn the blue plastic nut in a counter-clockwise direction until firmly in place.
That is it! Turn the water supply back on, your tank will fill up, replace the lid and you are done.
If you have any any questions, please contact our customer service team at 1-800-460-7019