The Help Articles below are meant to help you to diagnose issues, find the part you need or to help you with any repair or maintenance issue. They contain step by step instructions to make the process easier.
If you need any assistance, you are always welcome to contact our Customer Service team toll free at 1-800-460-7019 or email us at info2020@sustainablesolutions.com
If your 326611 soft-close, detachable seat is loose or isn't aligned properly to the bowl, it is a quick and easy fix. Step by step instructions are listed below and this video shows you the entire installation process.
1. First you will want to remove the seat. To do this, simply push the two quick release buttons on the inner centre of the seat underside and lift the seat upward to remove it from the mounting pins.
2. Remove the decorative hinge cover plates by lifting them upwards. Set them aside.
3. Using a Phillips screwdriver, loosen the bolts. (You will want them loose enough to be able to move the seat around to align it, but not so loose that it won't stay in place on it's own).
4. Replace the seat by aligning the hinge pins with the holes on the bottom of the seat. (Don't worry about replacing the hinge covers at this point. They are simply decorative and not needed to do the adjustment.)
5. With the seat attached, move the seat into the correct position, which will move the positioning of the hinge. Once the seat is properly aligned, (so the sides are evenly placed over the bowl and the front aligns with the front of the bowl), again remove the seat by pushing the. two quick release buttons on the inner centre of the seat, being careful not to move the hinge/pin positions.
6. Tighten the screws.
7. Replace the seat again, making sure that it is tight and aligned properly.
8. Once you are happy with the seat positioning, remove the seat again and replace the decorative hinge covers.
Fully skirted toilets feature a completely smooth bowl that don't show the outline of the trapway, so they are not only beautiful, but also much easier to clean and keep clean. They do require a different method of installation from a standard 12" bolt down toilet. For Caroma toilets that method is Smart Connect.
Smart Connect utilizes an offset adaptor that fits overtop of the rough-in flange and wax ring, keeping the installation clean and neat. For anyone who has removed a toilet and had to clean up the mess of an old wax ring you will appreciate how revolutionary this system is. Once the Smart Connect offset adaptor is installed you don't have to remove it again, even if you remove the toilet.
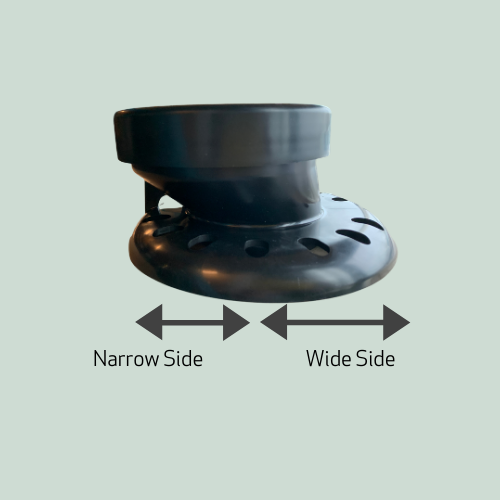
The real genius of Smart Connect though lies in its adaptability. The offset adaptor features one side that is wider than the other. This allows you to install a Caroma skirted bowl on either a 10" or a 12" rough-in, simply by turning the adaptor.
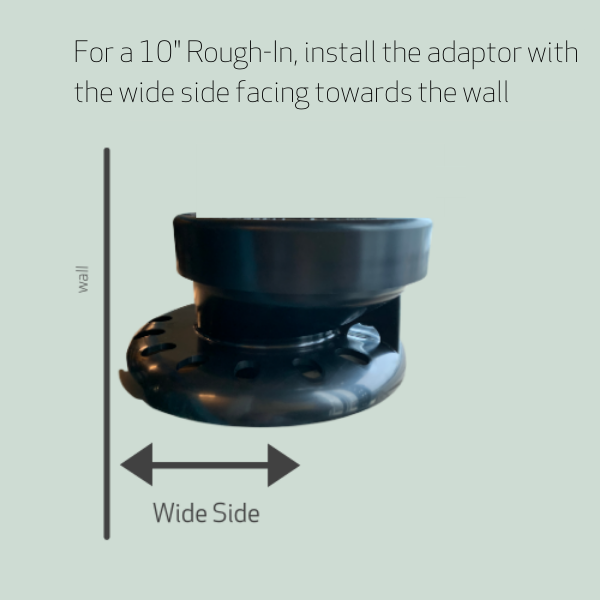
For a 10" installation, you turn the adapter so that the wide side of the adaptor is facing towards the wall.
For a 12" installation, you turn the adapter so that the wide side of the adaptor is facing away from the wall.
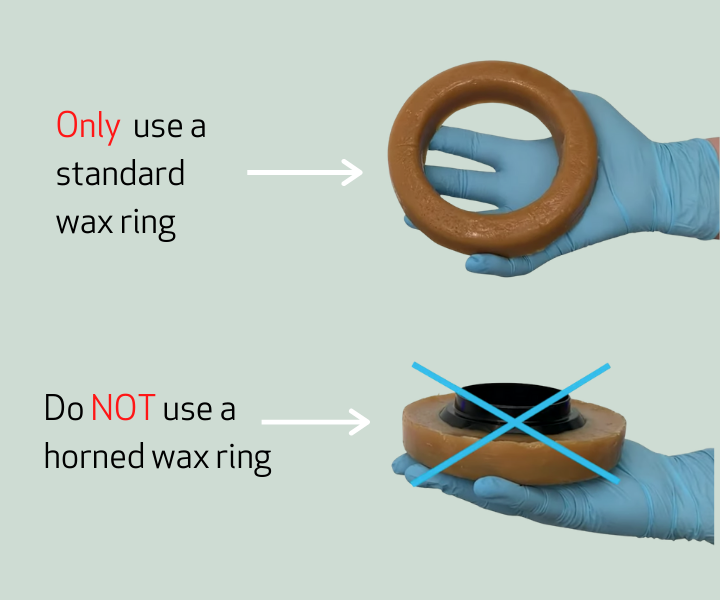
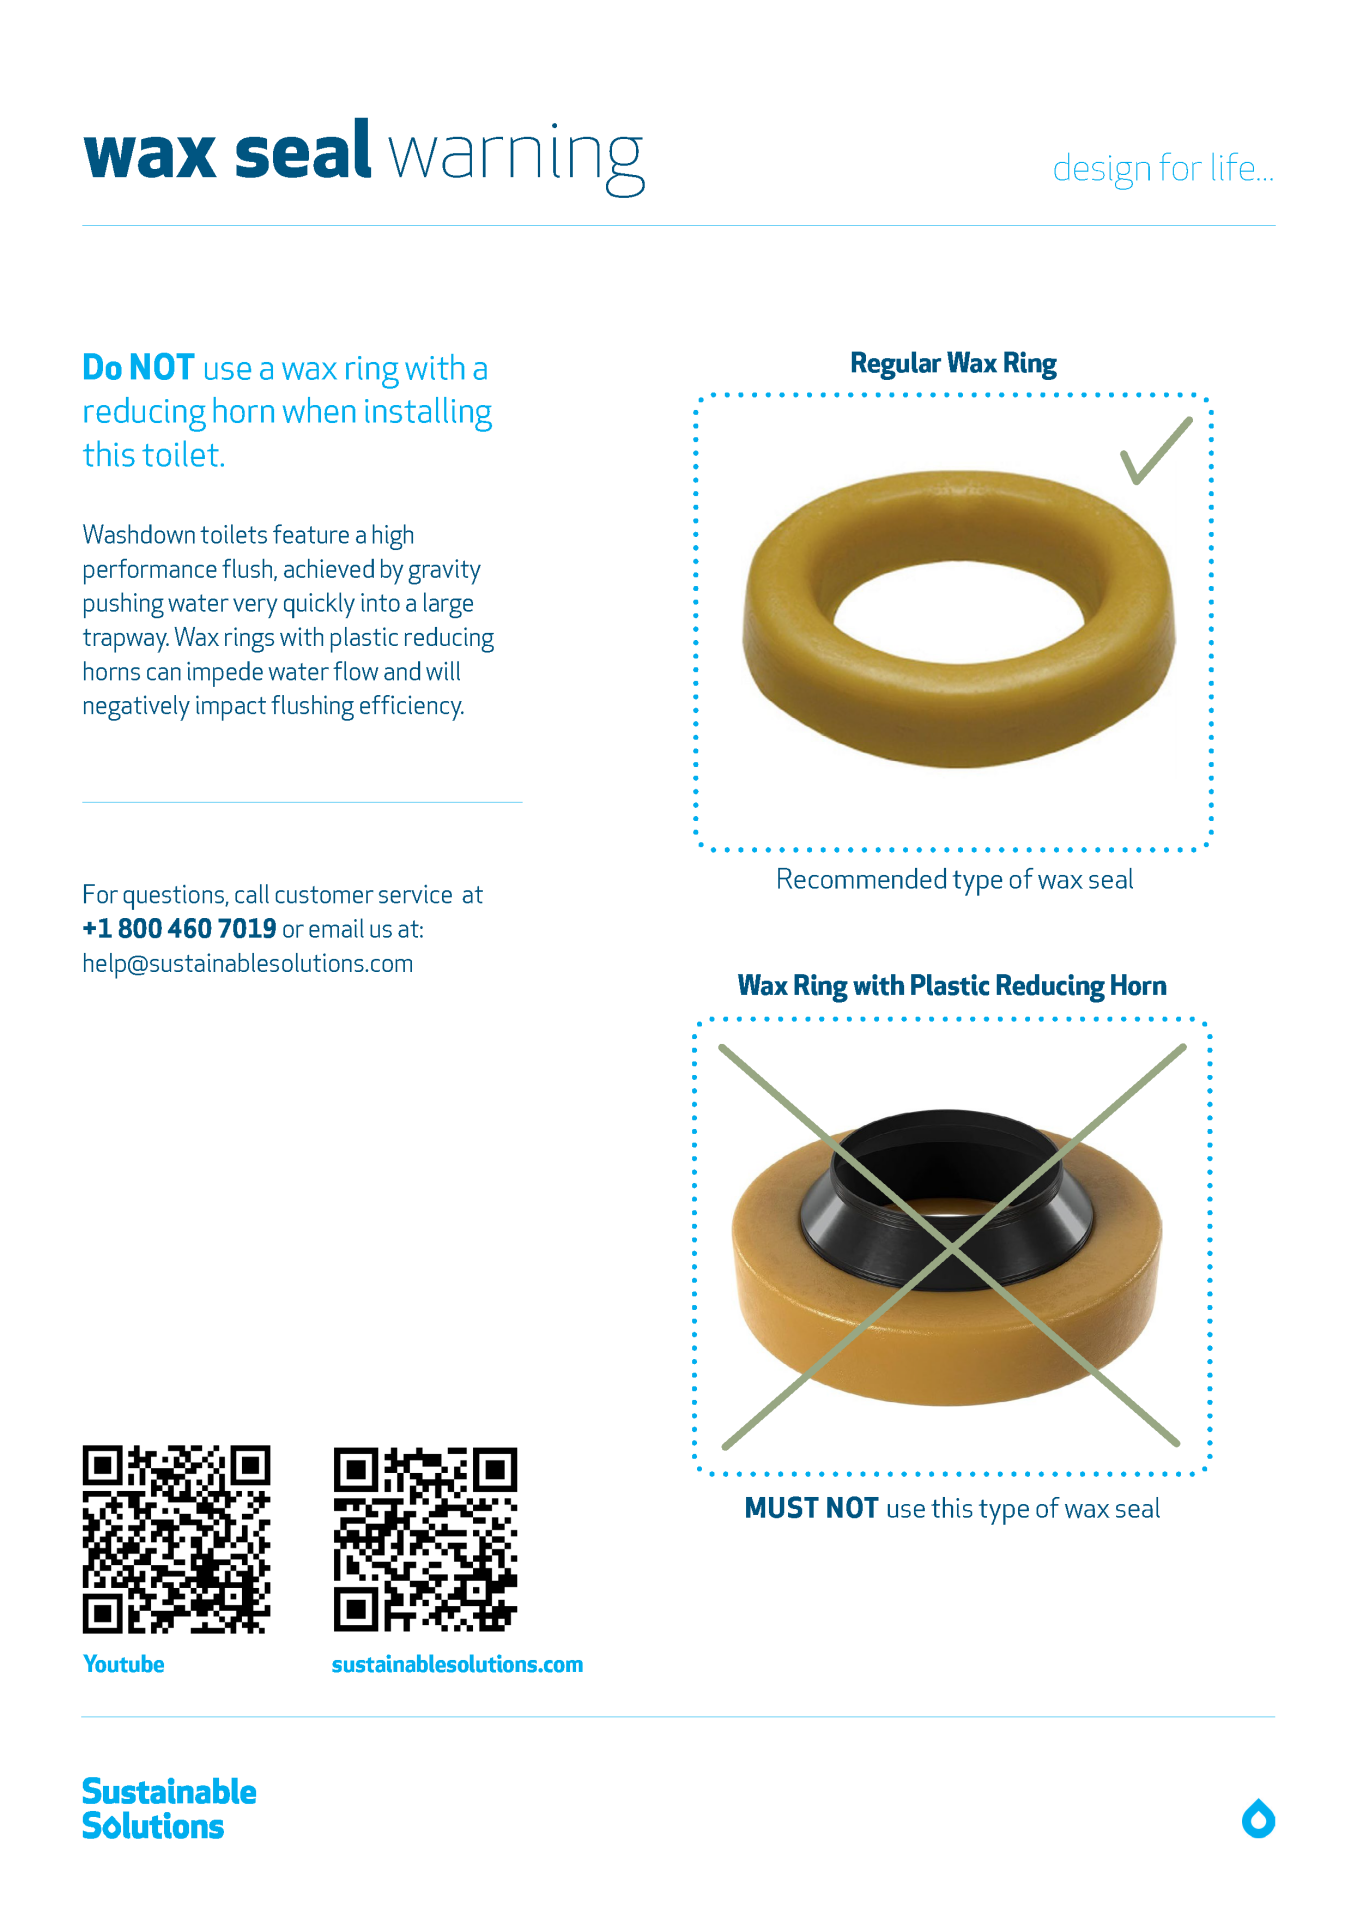
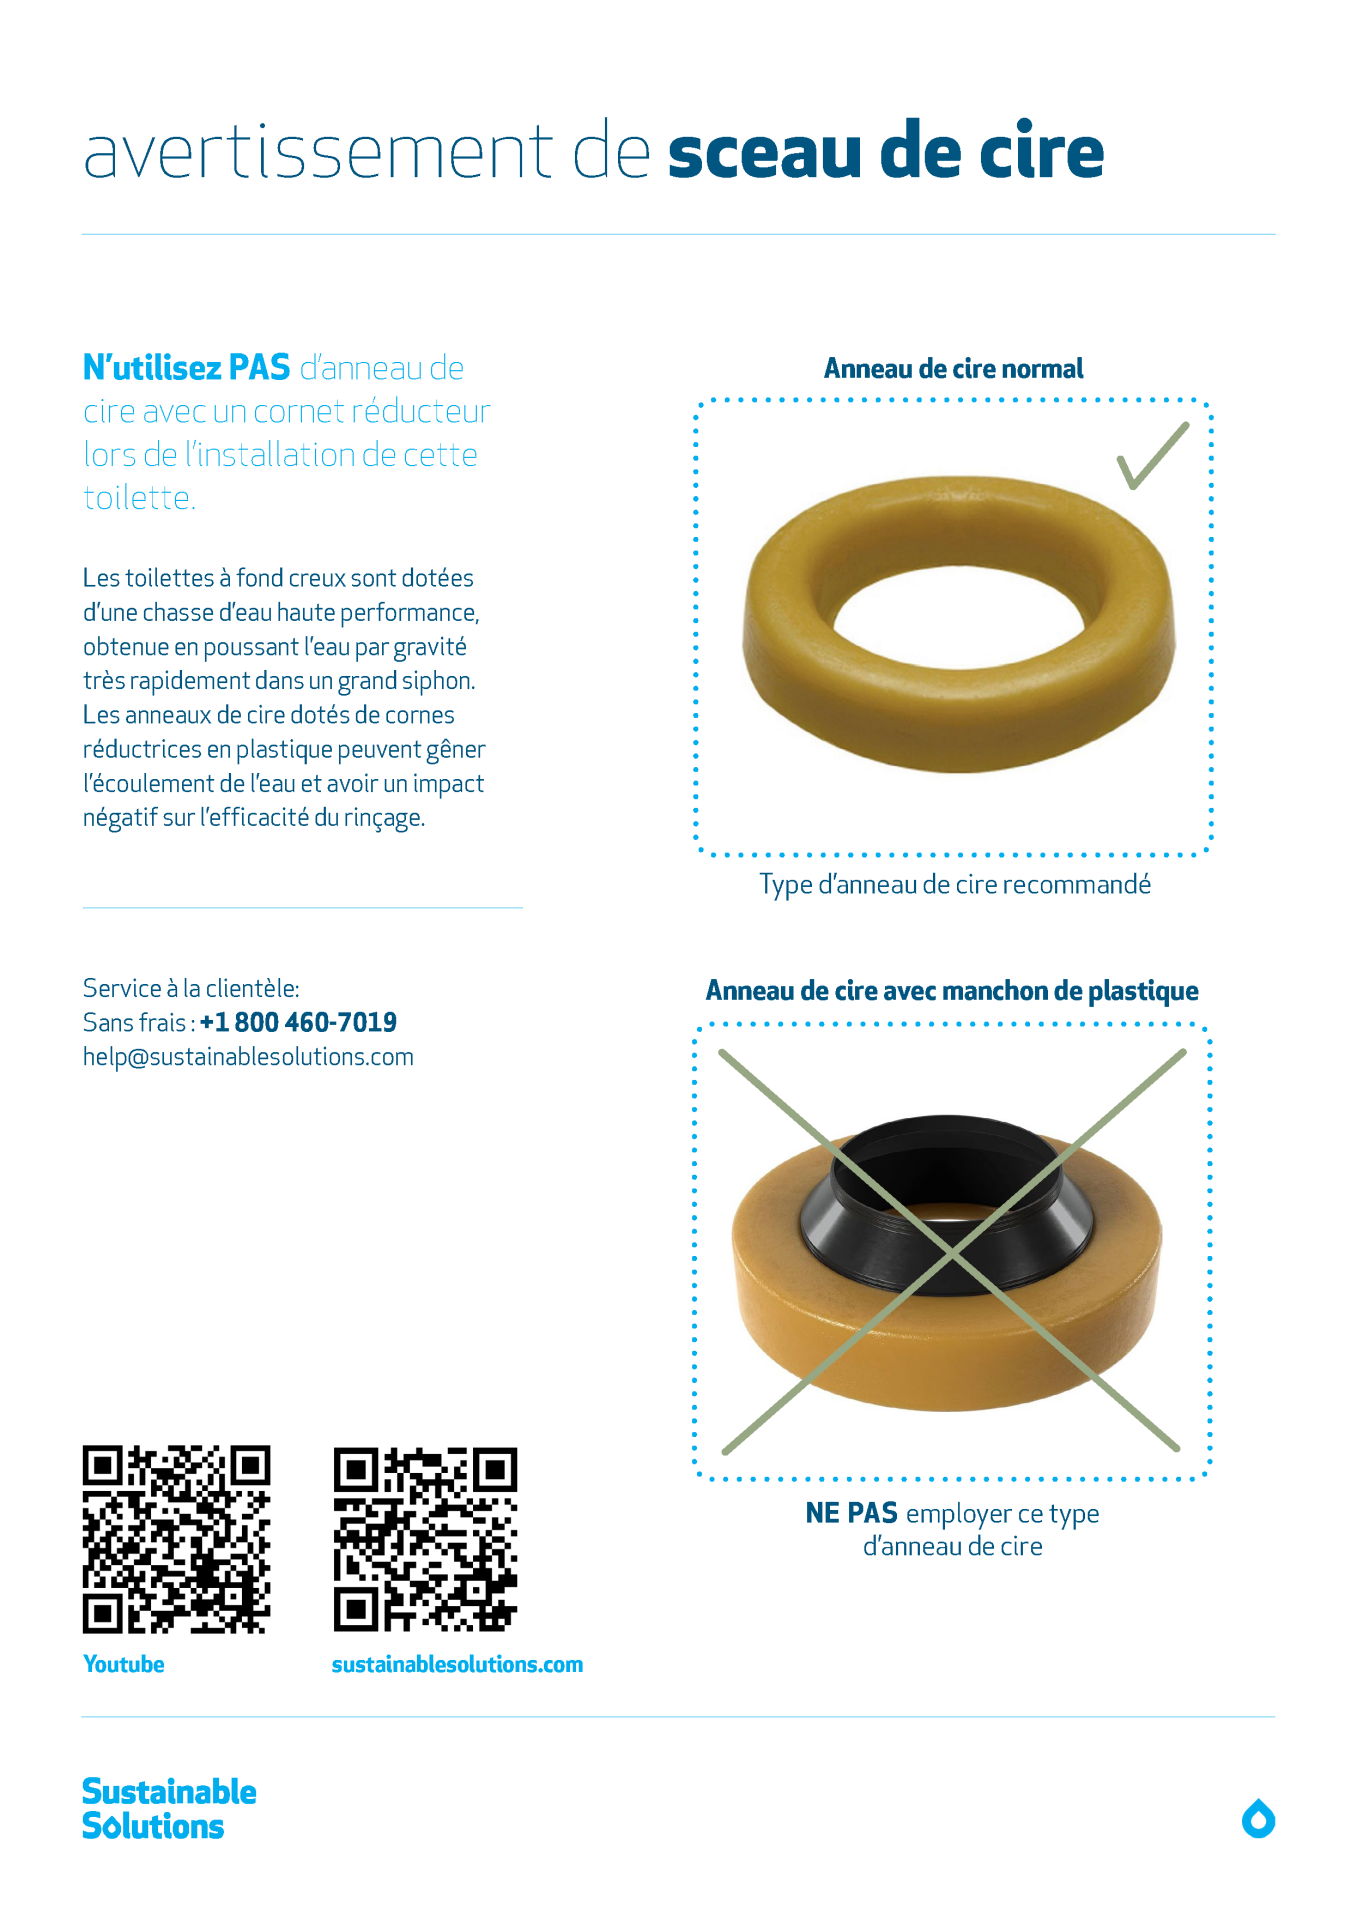
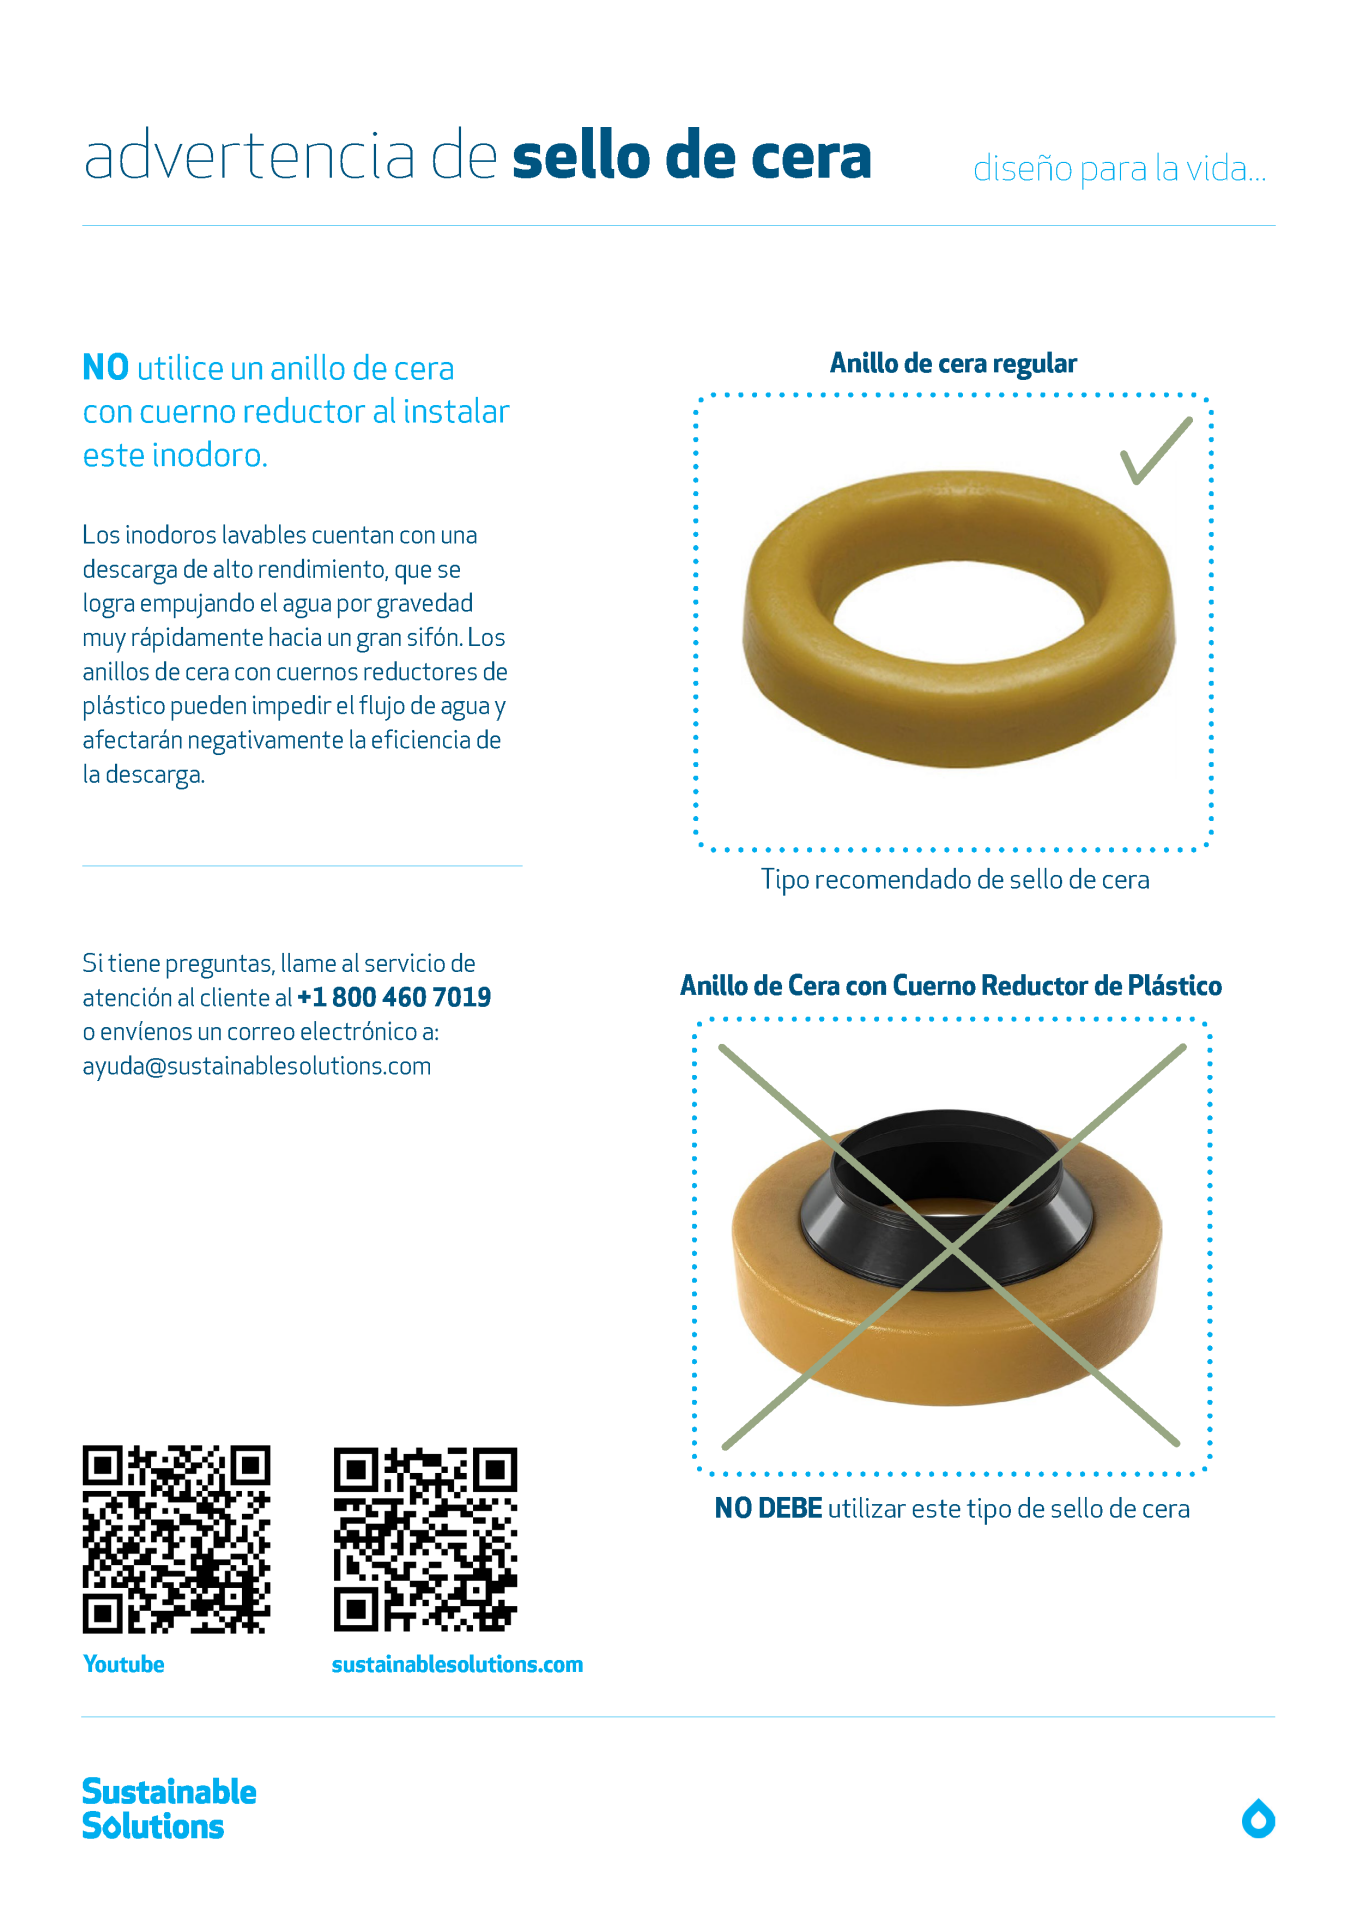
Now that you understand how the adaptor works, let's jump in to the installation. One of the most important things to remember when installing a Caroma toilet is to use the correct wax ring. It is essential to use only a standard wax ring and not a wax ring with a reducing ring. Using a horned rim can cause a sluggish flush, back siphoning and clogging. They are not designed to work with wash-down toilets.
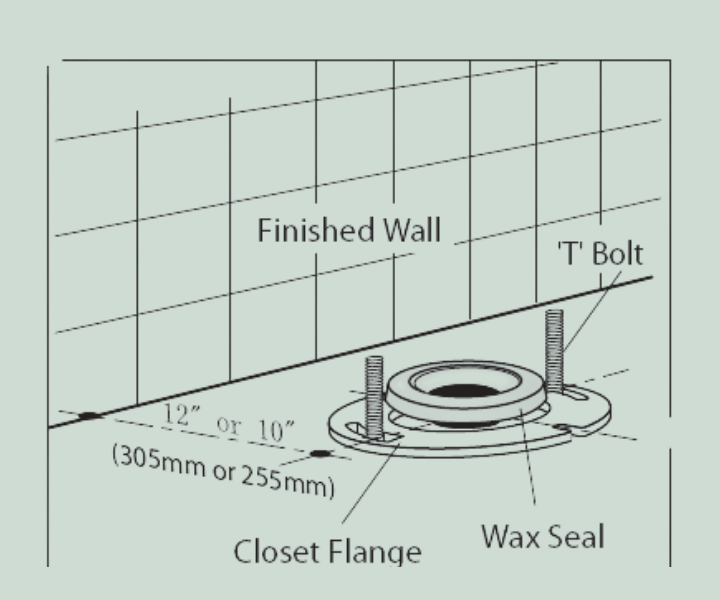
Position the wax ring and "T" Bolts as shown below
Then, simply place the offset adaptor over top of the wax ring, pushing down until the bottom of the adaptor touches the floor. When the adaptor is in place check the inside of the adaptor to ensure that excess wax hasn’t leaked into the adaptor. If it has you will want to remove that excess. Remember, this is where water and waste travels through to your plumbing systems. Excess wax build up here may eventually cause a blockage. So, just scrape away any excess wax with your gloved hand or a tool and remove it.
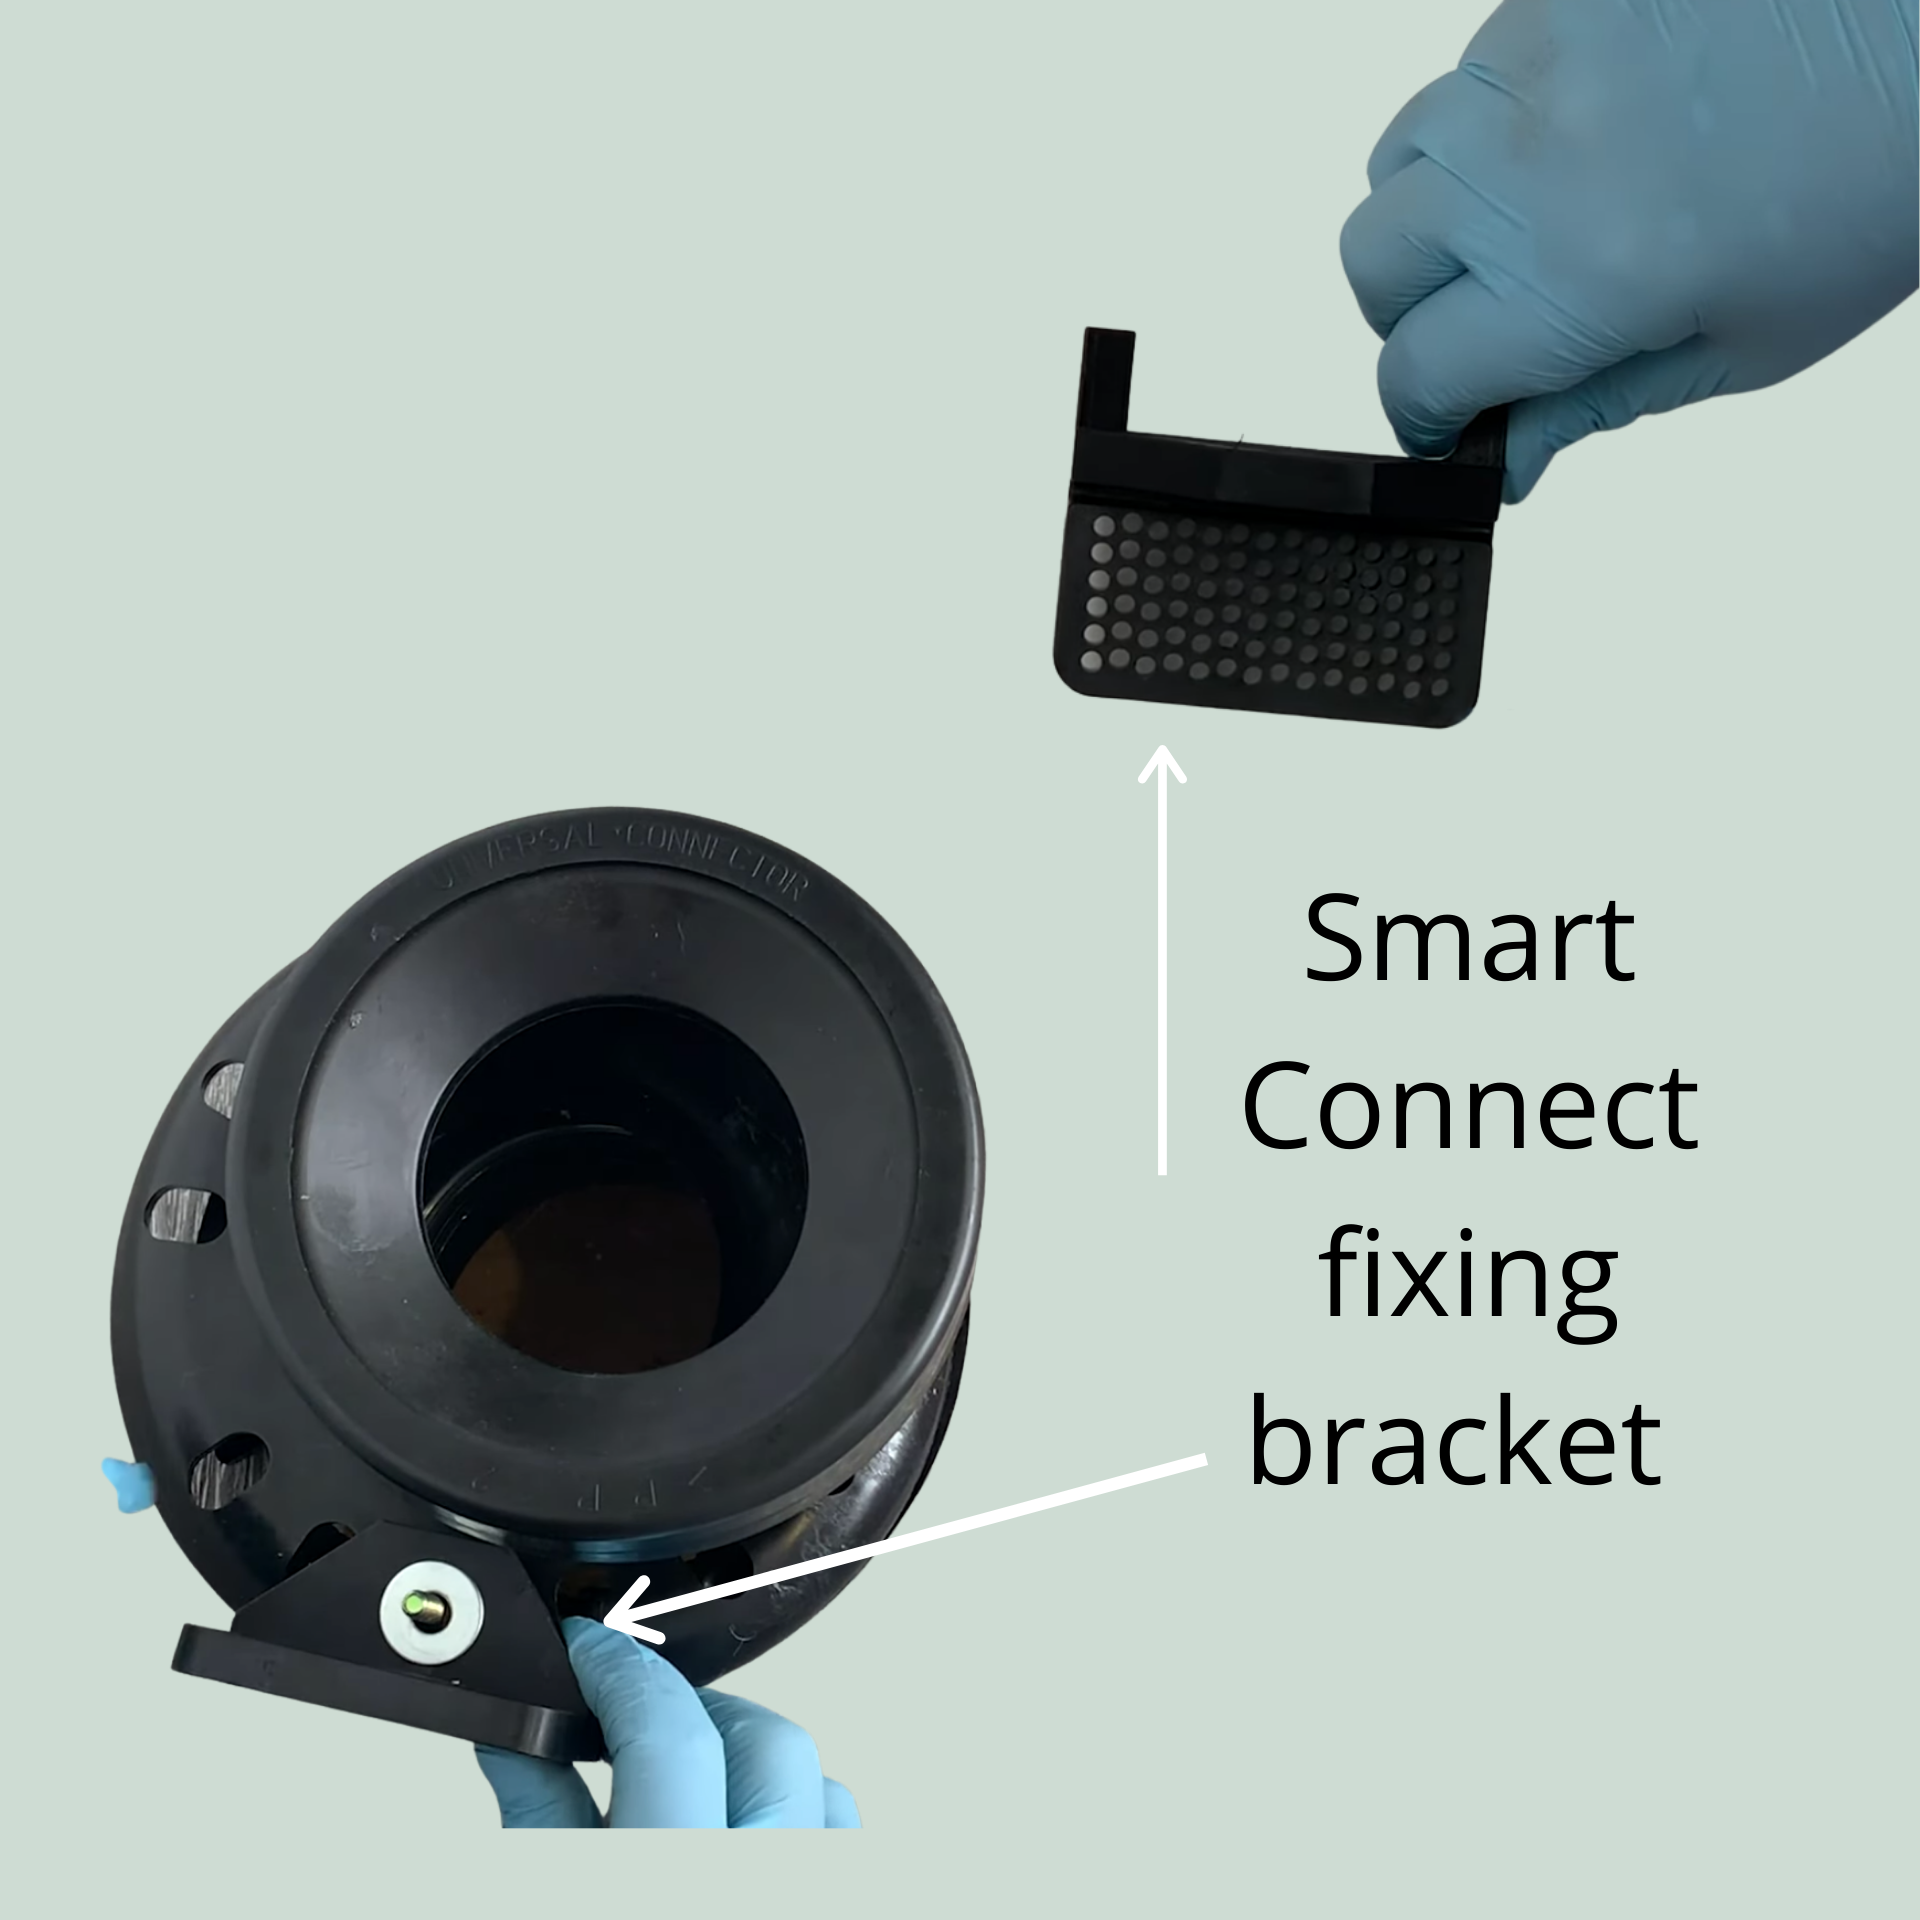
Next, you will need to place the fixing brackets on either side of the adaptor. The multiple hole pattern of the fixing bracket provides a contact surface for the final bolting from the exterior of the bowl so it’s important to place it now. Simply slip the fixing bracket over top of the T bolts and tighten them down with the washers and nuts included with the rough-in. This is not only setting up the final step of your connection, but it is also what is attaching the adaptor securely to the floor.
Here’s an insider tip for you – depending on the placement of the adaptor in your environment, it can be really difficult to get in to tighten the nuts over the T Bolts. If this is the case you can simply pull off the top portions of the adaptor, giving much more room to work.
Make sure that the bolts are tightened down, but don’t over tighten as that will affect the position of the bracket. Once both brackets are tightened, if you have removed the top portions of the adaptor, just place them back on. Tidy up the area around the adaptor and ensure that the entire area is clean and free from all building materials and debris. It is now time to place the toilet onto the adaptor.
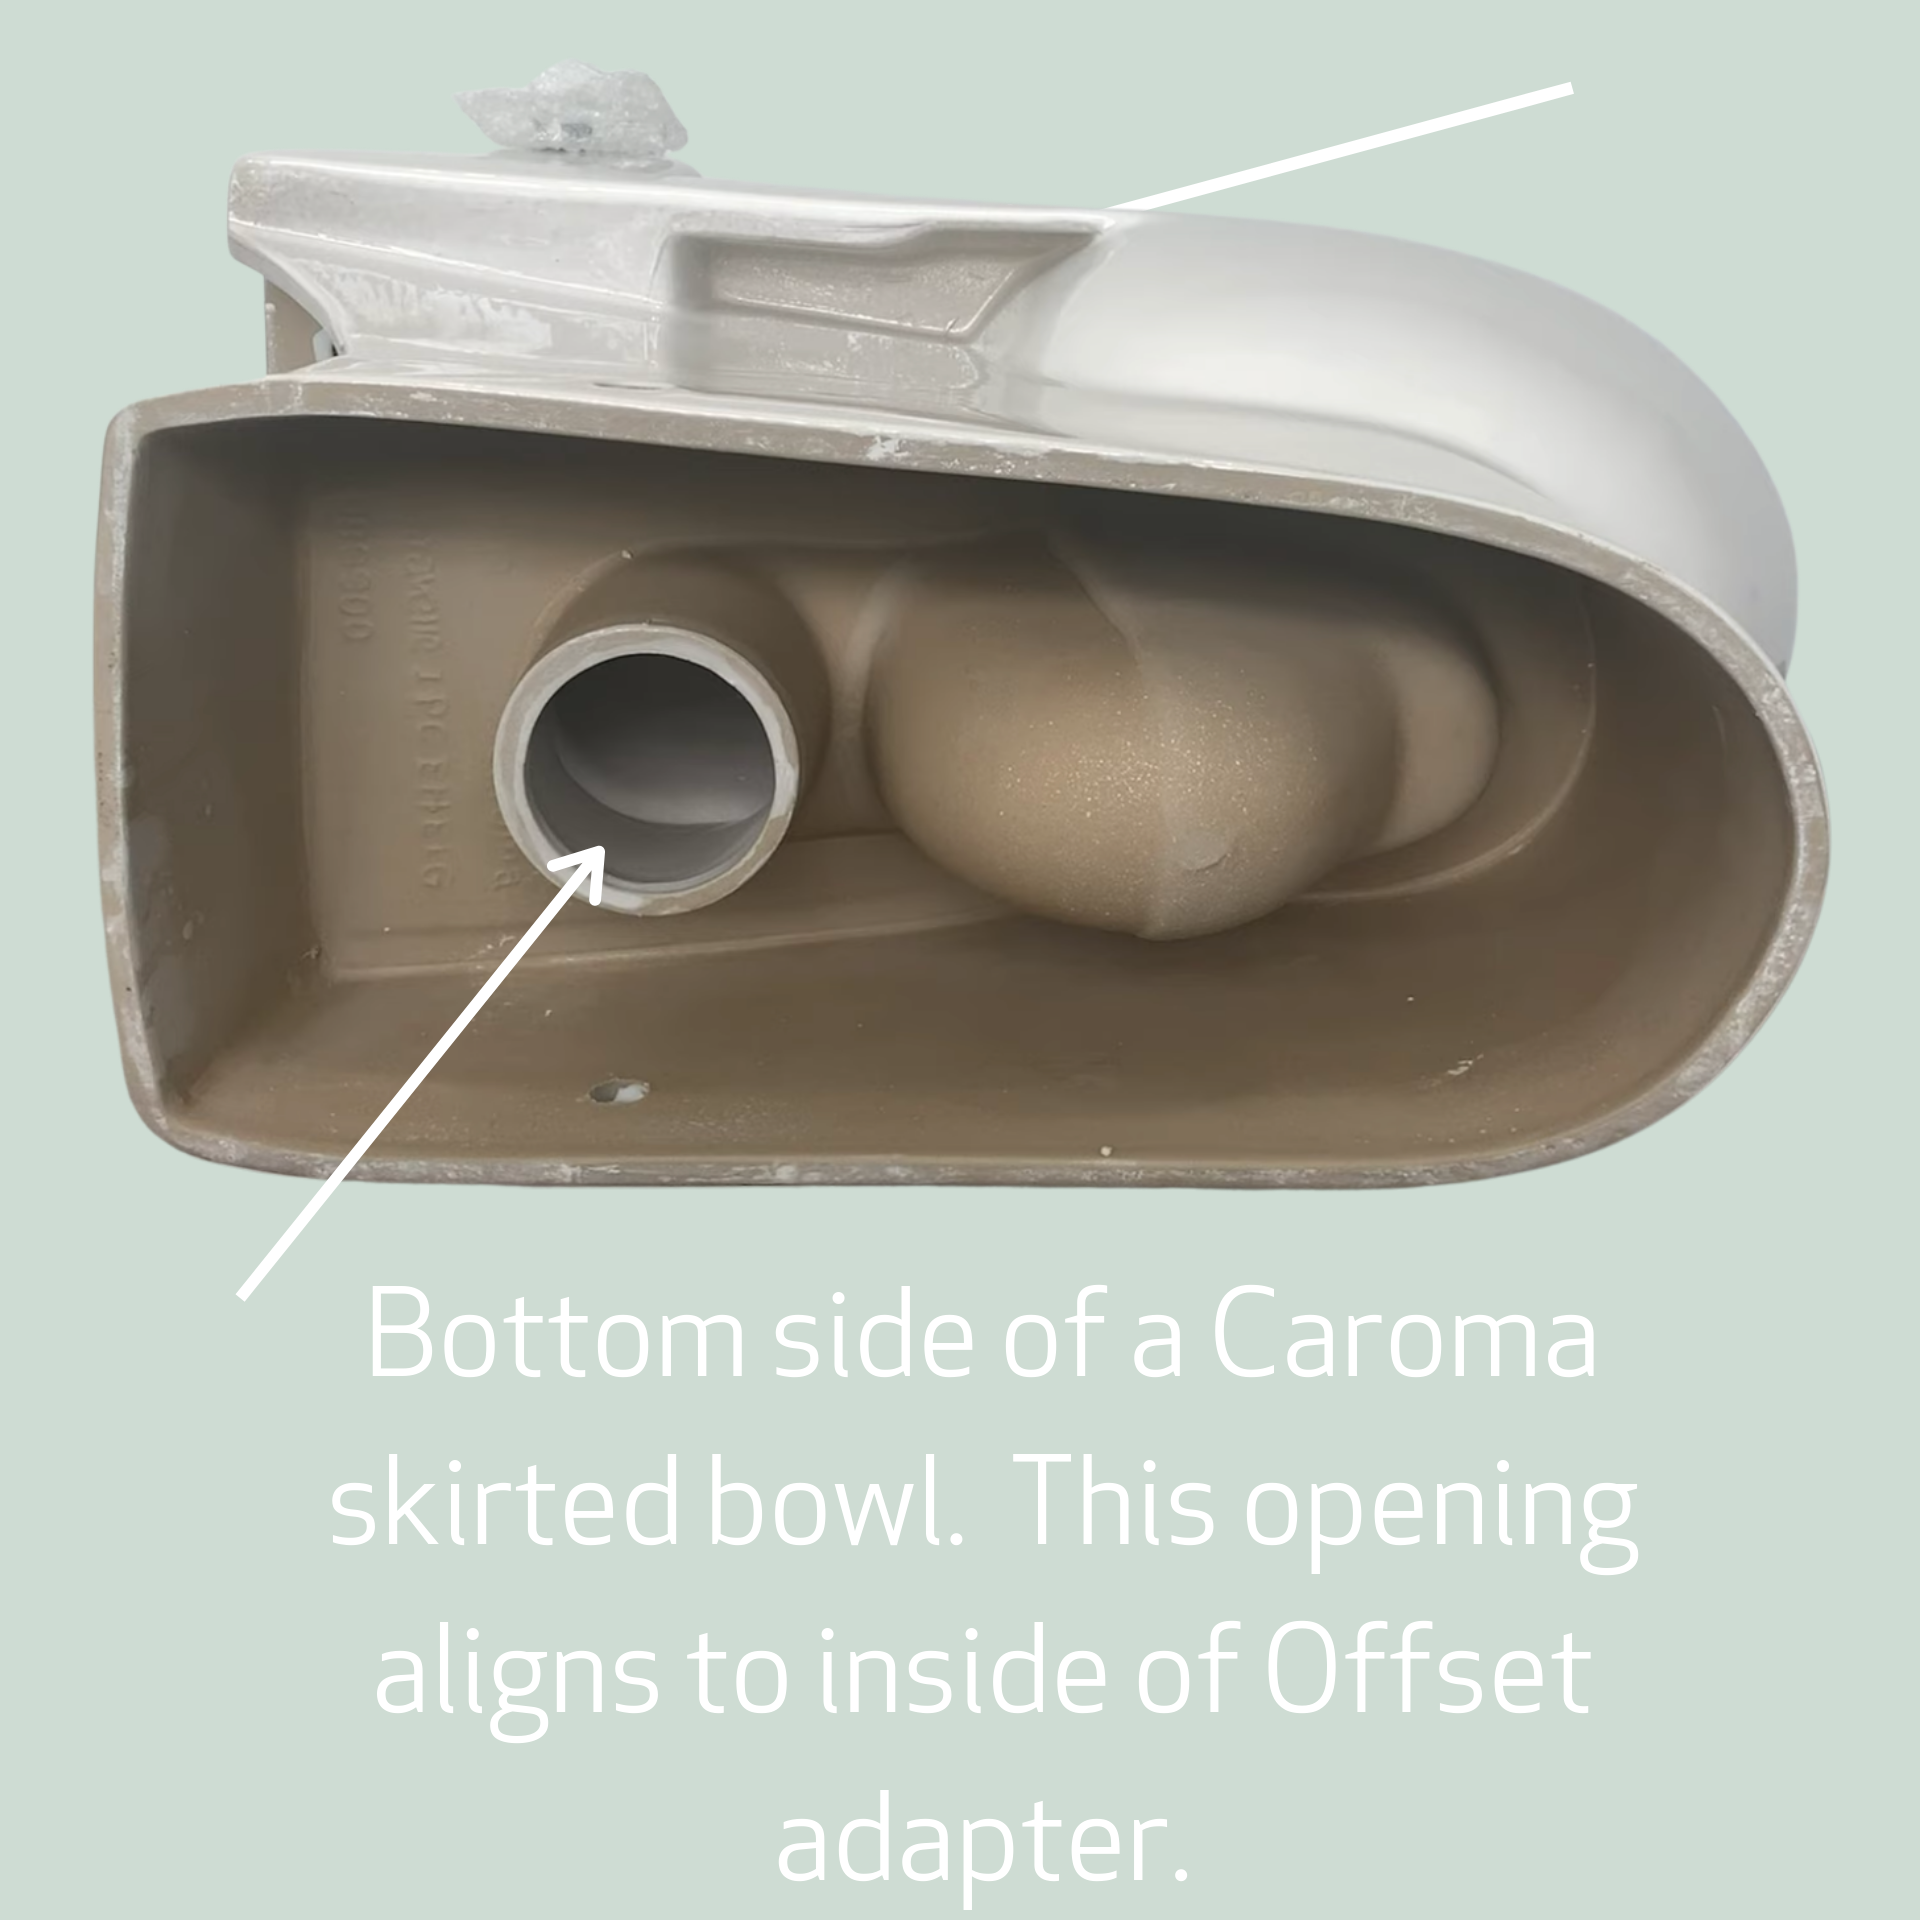
If you look at the bottom of a fully skirted Caroma bowl, it will look like this.
The round portion of the base fits inside the offset adaptor, giving a nice tight seal. The great thing about the Caroma smart connect is that once you have placed the adaptor over the wax ring, you are able to later remove the toilet if necessary, without having to touch or replace the wax ring, making the whole process clean and simple.
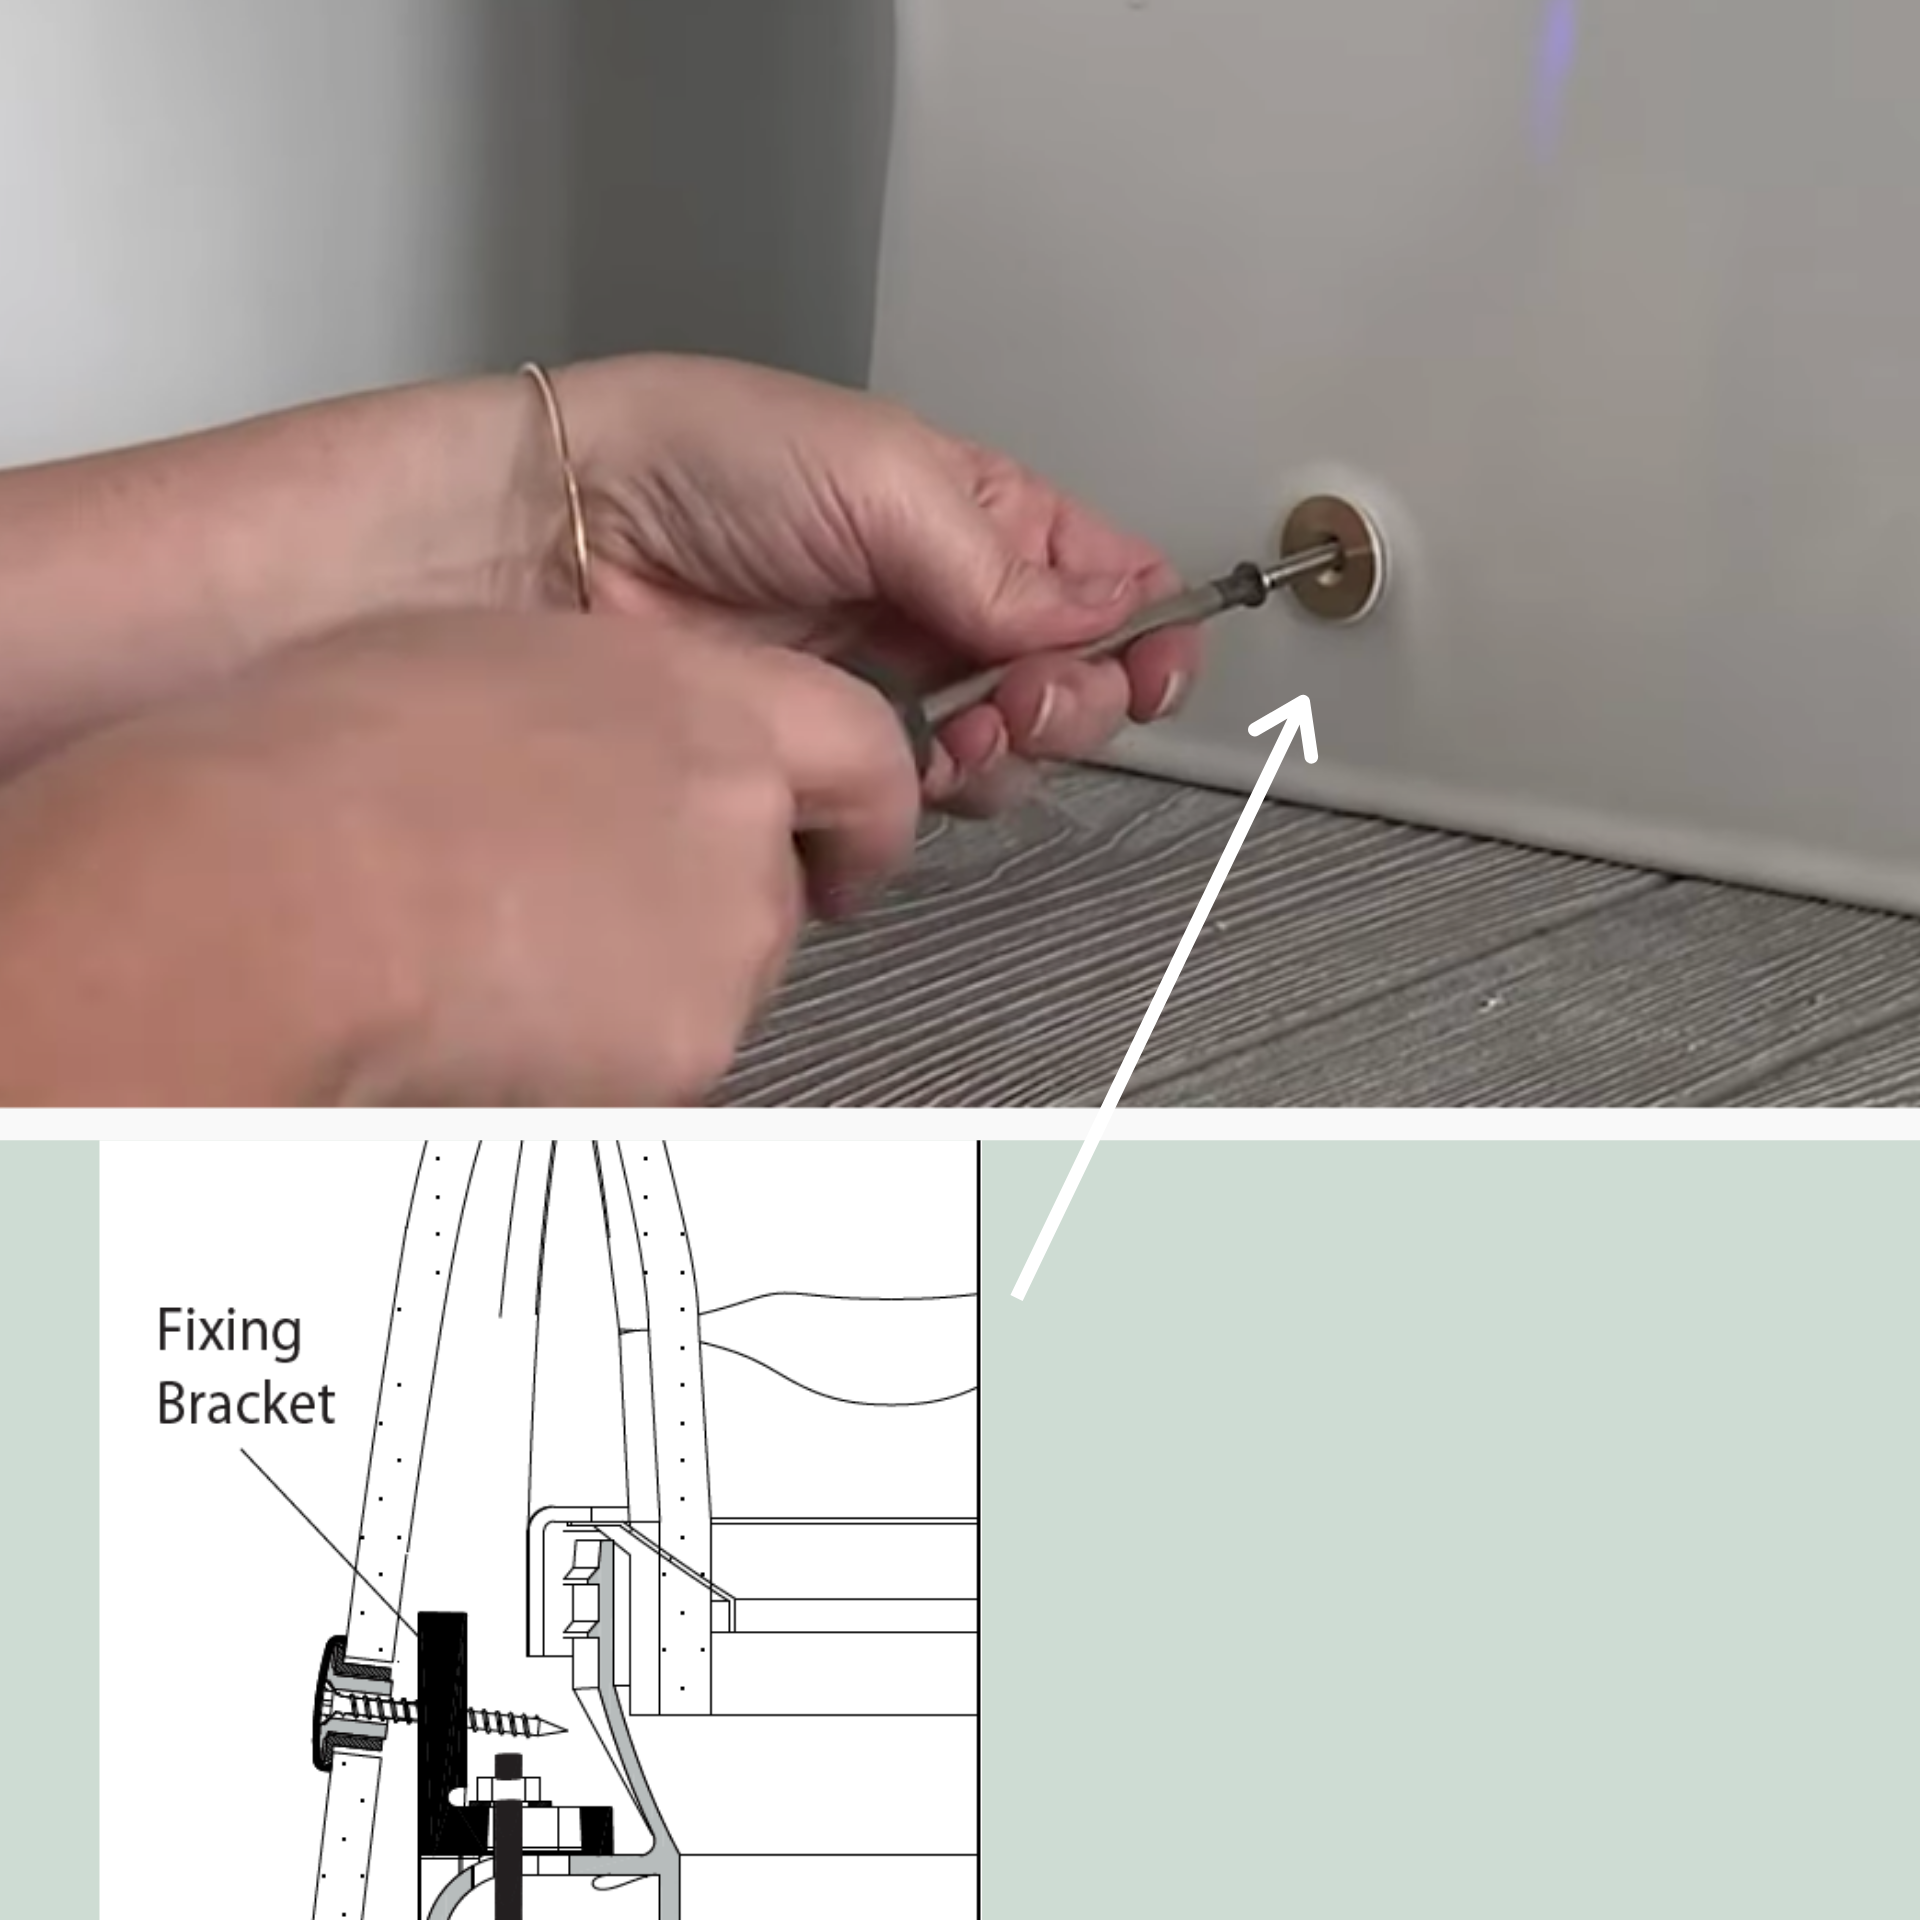
Once you have placed the bowl over top of the adaptor, you will insert the plastic bushing, brass bushing and stainless steel screw into each of the side holes, turning with a Phillips screwdriver until tight.
At this point the screw is going into one of the holes on that fixing bracket that you attached to the offset adaptor. This step secures the bowl directly to the offset adaptor and the rough-in. Insert the second screw in the same manner on the other side of the bowl. Then pop the decorative cap on top of the brass bushing to make the whole installation almost invisible.
Run a bead of silicone caulking around the base to prevent any water from getting under the bowl. Make sure to leave a one inch opening at the back, and you are done!
This entire installation is shown in the video above. Complete installation instructions are included with every Caroma bowl and if you need further assistance just give our Customer Service team a call at 800-460-7019 or Click Here to email us. We are here to help.
To purchase a new Caroma Smart Connect Offset Adapter, you would need a part #415245. (Click on this link to take you to the online store)
It is very important when installing a Caroma washdown toilet that you choose the correct wax ring. You can not use any wax ring with a flange or reducing horn.
Using a reducing wax ring will affect the performance of your toilet, and can cause clogs, low performance flushing, siphoning or many other issues.